
오늘은 몰랐으면 내일은 알면 된다
[Spring&Angular] 게시판 페이징 3. AngularJS 페이징 본문
페이징 버전 3으로 AngularJS 를 사용해볼 것이다.
그런데 개념이나 코드 자체는 Spring 버전과 별로 다를 게 없기 때문에 자세한 설명을 보려면 아래의 글을 참고하면 좋을 것 같다.
다른 방법이 있을 것도 같지만 기존에 만들어둔 코드를 활용해서 AngularJS 버전으로 바꿔보도록 하겠다.
[Spring] 게시판 페이징 1. Page Maker.java
페이징을 정말 수도없이 많이 했는데 사실은 원래 만들어져있던 pager를 활용해서 수정하는 정도였기 때문에 실질적으로 내가 했다고는 볼 수 없었다. 처음 교육기관에서 페이징에 대한 걸 알았
pieth.tistory.com
Spring 버전과 동일하게 만들어 줄 것이다.
controller 에서의 차이가 있다면 Spring 버전에서는 한 컨트롤러에서 Get Post를 모두 받으면서 페이징 처리를 해주었지만, AngularJS 버전에서는 AJAX 를 사용해야 하기 때문에 페이지 접근, 데이터 요청 컨트롤러를 분리해주었다는 것이다.
	@RequestMapping(value = "/intro/boardAngularVer", method = RequestMethod.GET)
	public String boardAngularVer() {
		return "/intro/boardAngularVer";
	}

	@ResponseBody
	@RequestMapping(value = "/intro/AngBoardList", method = RequestMethod.POST)
	public Object AngBoardList(@RequestParam HashMap<String, Object> params, Model model) {
		Criteria cri = null;
		PageMaker pm = null;

		List<HashMap<String, Object>> userList = null;
		HashMap<String, Object> pagination = null;
		int totalCount = 0;

		if(params.get("curPage") != null) {
			int curPage = Integer.parseInt((String)params.get("curPage"));
			int perPageNum = Integer.parseInt((String)params.get("perPageNum"));

			cri = new Criteria(curPage, perPageNum);
		} else {
			cri = new Criteria();
		}

		try {
			totalCount = userService.selectUsersTotalCount(params);

			pm = new PageMaker(cri, totalCount, NAV_PAGE_NUM);

			params.put("startRows", pm.getCri().getStartRows());
			params.put("perPageNum", pm.getCri().getPerPageNum());

			userList = userService.selectUsers(params);

			pagination = new HashMap<String, Object>();
			pagination.put("pageMaker", pm);
			pagination.put("userList", userList);
		} catch (Exception e) {
			e.printStackTrace();
			return  "오류가 발생했습니다.";
		}
		return pagination;
	}
AJAX 쪽 코드는 Spring 버전의 코드와 거의 동일하다. 차이점이 있다면,
Spring 버전에서는 데이터 리스트와 pageMaker를 모두 model attribute로 등록해주지만,
AngularJS 버전에서는 AJAX를 사용해야하기 때문에 두 데이터를 HashMap 객체에 담아서 반환한다는 것이다.
그 외에는 다 똑같다.
이제 jsp 쪽을 살펴보자.
<%@ page language="java" contentType="text/html; charset=UTF-8"
    pageEncoding="UTF-8"%>
<!DOCTYPE html>
<html>
<head>
<meta charset="UTF-8">
<title>Insert title here</title>
<style>
	.table {
		width: 50%;
		border: 1px solid black;
		border-collapse: collapse;
	}
	.table th,td {
		text-align: center;
		border: 1px solid black;
	}
	.d-flex {
		display: flex;
		-ms-display: flexbox;
	}
	ol, ul {
		list-style: none;
	}
	.curPage {
		color: red;
	}
	.title {
		cursor: pointer;
		color: blue;
	}
</style>
<script src="https://ajax.googleapis.com/ajax/libs/angularjs/1.8.2/angular.min.js"></script>
<script>
	var app = angular.module('myApp', []);

	app.controller('searchController', function($scope, $http, $window) {
		$scope.perPageOptions = [10,20,30];

		$scope.search = function() {
			$http({
				method: 'POST',
				url: '/basic/intro/AngBoardList',
				params: {
					'perPageNum' : $scope.perPageNum === undefined ? 10 : $scope.perPageNum,
					'curPage' : $scope.curPage,
					'username' : $scope.username
				}
			}).then(function successCallback(response) {

				//데이터 리스트
				$scope.dataList = response.data.userList;

				//페이징 관련 시작
				var pageMaker = response.data.pageMaker;

				$scope.prev = pageMaker.prev;
				$scope.next = pageMaker.next;

				$scope.curPage = pageMaker.cri.curPage;

				$scope.pages = new Array();

				for(var i = pageMaker.startPage; i <= pageMaker.endPage; i++) {
					$scope.pages.push(i);
				}

				$scope.goPrev = function() {
					$scope.curPage = pageMaker.startPage - 1;
					$scope.search();
				};

				$scope.goNext = function() {
					$scope.curPage = pageMaker.endPage + 1;
					$scope.search();
				}
				$scope.movePage = function(page) {
					$scope.curPage = page;
					$scope.search();
				}
				//페이징 관련 끝
			}, function errorCallback(response) {
			});
		}

		$window.onload = $scope.search();
	});
</script>
</head>
<body ng-app="myApp">

	<div ng-controller="searchController">
		<form>
			<input type="text" ng-model="username" placeholder="검색 ID 입력">
			<select ng-model="perPageNum" ng-options="x for x in perPageOptions"></select>
			<input type="hidden" ng-model="curPage">
			<input type="button" value="검색" ng-click="search()">
		</form>
		<table class="table">
			<thead>
				<tr>
					<th>아이디</th>
					<th>권한</th>
				</tr>
			</thead>
			<tbody>
				<tr ng-repeat="x in dataList">
					<td class="title" ng-click="">{{x.USERNAME}}</td>
					<td>{{x.AUTHORITY}}</td>
				</tr>
			</tbody>
		</table>
		<div class="pagination">
			<ul class="d-flex">
				<li ng-show="prev" >
					<input type="button" class="prev" ng-click="goPrev()" value="<<">
				</li>
				<li ng-model="pages" ng-repeat="x in pages">
					<input type="button" value="{{x}}" ng-click="movePage(x)" ng-class="{'curPage': x == curPage}">
				</li>
				<li ng-show="next">
					<input type="button" class="next" ng-click="goNext()" value=">>">
				</li>
			</ul>
		</div>
	</div>
</body>
</html>
동작하는 방식은 똑같다.
1. 페이지가 로드될 때 데이터를 세팅해준다. ($window.onload)
2. 반환받은 pageMaker 객체의 데이터를 활용해서 pagination nav을 만들어준다.
3. nav를 클릭할 때마다 curPage, perPageNum 을 넘기면서 데이터 요청을 보낸다.
Spring 버전과 AngularJS 상에서의 문법이 좀 달라서 좀 헤맸던 부분이 있는데, 기초적인 AngularJS 문법 미숙으로 인한 것이었으므로 트러블 슈팅 관련으로는 따로 적지는 않겠다.
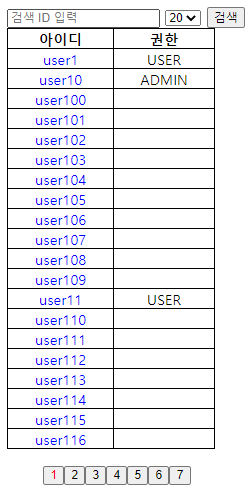
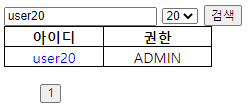
결과는 동일하다.

'Front > Angular' 카테고리의 다른 글
| [Angular] AngularJS 튜토리얼 17. Validation (0) | 2021.03.15 |
|---|---|
| [Angular] AngularJS 튜토리얼 16. Forms (0) | 2021.03.15 |
| [Angular] AngularJS 튜토리얼 15. 이벤트(Events) (0) | 2021.03.15 |
| [Angular] AngularJS 튜토리얼 14. HTML DOM (0) | 2021.03.12 |
| [Angular] AngularJS 튜토리얼 13. Select box (0) | 2021.03.12 |


